Interior Trim
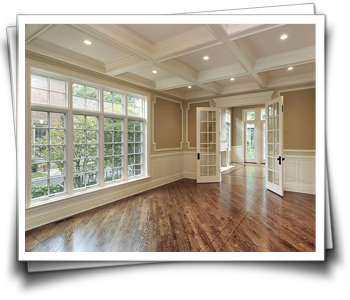
 The interior trim for your home are the pieces of wood that go around all your windows, doors, and along the baseboards as well as the cased openings in hallways and crown molding along the ceiling.
The types of interior trim you choose can range from very basic to more highly intricate pieces with elaborate designs. The interior of your home can have different types of trim depending on the area it is installed. For example: you can go with more basic designs around windows, doorframes and baseboards, while choosing extravagant trims in other areas such as triple step crown molding around the ceilings, chair rail with inlaid panel molding, and several steps of trim for a fireplace mantel.
Tips for Installing Interior Trim
The first step is the planning phase. Decide what your budget will be and then you can determine what type and how much trim material you will use and need. You will need precise measurements for this phase, as you do not want any excessive waste or have to order more material during the installation process that may be special order.
There is a certain cost to value ratio when installing interior trim. You can only add value up to a certain point with trim, after that point no matter how extravagant you get it doesn’t add any more value (your house may still appraise for the same amount, no matter how much trim you add). You will want to be aware of this aspect when you are in the planning phase.
You will also need to make sure that you already have or can acquire the proper tools needed to install trim. Also, you’ll need to know the proper procedures to coping trim, cutting and connecting compound miter cuts, and know which fasteners to use during installation. Additionally, be aware that if you use paint grade trim, gaps in the joints can be concealed with a little skill and a caulking gun. However, if you use stain grade trim, then how it is installed is how it looks when it is 100% finished.
Having Trim Professionally Installed
Interior trim is actually one of the aspects of construction that requires a high skill level and many years of experience to install correctly. Mistakes are easily made and they can become quite expensive if you have to replace a whole piece of material for each mistake. Any mistake is magnified and less tolerated when it comes to installing stain grade material. You don’t have the luxury of putty, caulking and paint to cover a bad joint or cut. When you are done installing stain grade trim, that is the permanent finish. So you can’t have big joints or gaps, nail holes or hammer marks. Also, stain grade material is usually more expensive and you want to make as few mistakes as possible when installing.
It is not the best choice for your home’s value to have your trim installed by a novice. Trim that is installed with visible mistakes or in a shoddy manner, can actually degrade the value of your home instead of improve the value. Conversely, polished and professionally installed trim will bring a look of quality to the home. Using a professional will add higher quality to the project, which will therefore add value to the home.
A skilled finish carpenter is equipped with the proper tools, which makes a big difference in the quality of craftsmanship. Not only are the correct tools important, but it is also just as important to have knowledge and experience in estimating, measuring, cutting and installing trim. A professional craftsman is insured, licensed and bonded to protect the value of your home.
If you’re considering having a professional upgrade to your home with interior trim, give Hatter and Sons, Incorporated a call. For the best in all types of renovations, new home building and service, call Philip Hatter today @ (540) 569-6351 for a consultation.


